
Entering your cards into blog challenges is the next step in blogging and can be a bit daunting the first time.
It really is simple though.
This is the way that I do it.
Firstly, type up your blog post as normal with your card that you want to enter into the challenge. Next you might already know which challenge you want to enter, but most of the time you may just want to enter it into as many challenges as you can.
Either way, the process is the same.
I would recommend that you visit Feline Playful. This is a pretty comprehensive blog that lists hundreds of blog challenges and what the current challenge is. It is updated daily, and also includes information such as how many times you can enter the challenge, how many challenges you can combine it with and for how long the challenge is open.
The next step is to add links to your post to the blog challenges. This is a requirement of the challenges. Open a second tab or window and go to either the blog challenge you want to enter or the Feline Playful blog. Go to the blog post of the current challenge and right click on the blog post title and click on Copy Shortcut. Return to the tab or window with your blog post and type the name of the blog challenge and the name of the current challenge. Highlight the challenge name and click on the Link button and paste the URL into the box. Highlight the blog challenge name and again click on the Link button and paste again. This time, delete the URL until you have only the blog name (http://xxx.blogspot.com/). Alternatively, you can Copy Shortcut of the blog header image and paste this into the Link box.
It should look something like this:
Continue this until you have added all the blog challenges you want to enter.
The next step is to Publish your blog.
Now you have to actually enter the challenges.
To do this, right click on your blog post title and Copy Shortcut.
Now click on the links to the current challenges one at a time. Look for the Inlinkz or Mr Linky gadget where you will enter your details. When you click on the link, a few boxes will appear. Paste your blog post link into the box marked URL, then enter your name (the one you go by in the blog world) and your email address where prompted.
Occasionally, a blog challenge may not use Inlinkz or Mr Linky or it may not be working and you may have to enter your card by adding a link to it in the Comments form. You can see how to do this here.
Some blog challenges also add a thumbnail image of your card to the Inlinkz/Mr Linky gadget, so when the page of images appears, scroll through until you see the one of the card you are entering and click on Select or the image itself.
You have now entered your first blog challenge. Continue until you have entered all of them on your list.
Something else you may want to do is create a list of the blog challenges you have entered with the date that the winners are announced next to it. The onus is on you to check to see if you have won the blog challenges you've entered, so you will be expected to check back and claim your prize. I created a Word document and copied and pasted the list I made in Blogger as the links are also copied (and can be accessed by holding down the CTRL button as you click on them). I rearrange the list so it is then in date order, and add to it as I enter more challenges and delete the links when the winners are announced.
Wednesday, 23 March 2011
Sunday, 20 March 2011
Changing Your Template Back To A Normal One
If you have added a new template, such as one from Leelou, but you decide you want to remove it for some reason, maybe because you've seen a background on a different site you want to add, then follow the very simple instructions below:
Click on Design in the top right corner and then the Design tab and then click on the Edit HTML link. Then click on Select Layout Template and choose a new Blogger template to use. If you wish to add a new background from a different provider, then you will need to select Simple or Minima.
Thursday, 17 March 2011
Changing Your Blog To A 3-Column Blog
Before you attempt to change anything, as indicated below, PLEASE do the following:
PLEASE copy all your HTML code paste it into a word document. Make sure you save it as Original Blog or something and then if it does all go wrong you can paste your old code back in and pretend it never happened.
to find the code, click on Design and the Design tab and then click on Edit HTML. Copy EVERYTHING that is in the box under Edit Template and paste this into your Word document and save.
There are a couple of ways of changing your blog to a 3-column blog.
The first is to upload a free 3-column background, overwriting your 2-column one. If you use one of the Leelou backgrounds, you can keep all your gadgets that you have already set up without having to manually change any of the coding. However, not all background providers' templates will do this and you may have to paste your widgets/gadgets back into your template manually.
If you don't fancy that option, then there is an alternative.
However, I'm not going to pretend I have the first inkling how to do this myself. I managed to do it by following instructions on someone else's blog - so I feel the best way to do this is to direct you to the blog I used.
The blog is actually called Three Column Blogger and the post I used is here. It would be wrong of me to just copy and paste all their hard work onto my blog, so I'd rather you head over there. (and then if it goes wrong, you can blame them and not me!!)
If you decide to follow the new Leelou background path, then find yourself a 3-Column Blog over on the Leelou site and then follow my instructions called Changing Your Background.
If you decide not to follow the Leelou background path and decide you want to adapt the background you have then follow the link to Three Column Blogger and edit your template, adding and changing the html code where appropriate. The easiest way to find your way around all that text may be to click Ctrl+F and type in the word shown on screen. This will find every time that word is mentioned and will jump to each one rather than you having to scroll through all the text.
The instructions given on Three Column Blogger are easy to follow (they must be - I managed it!). Just work through it methodically and double check everything you type in before moving on to the next bit. If you put in anything wrong you will most likely have to start again unless you methodically go through it all to find your mistakes.
And remember, if the worst comes to the worst, then just paste back in what you started with from your Word document!
How To Add A List Of Your Favourite Blogs
This is called a Blog Roll or Blog List and is very simple to add.
Click on the Design link at the top right of the screen and then the Design tab and Page Elements. Click on the Add A Gadget button and scroll down to find Blog List. Click on the blue + button.
You can give your Blog List a name, and decide on the settings if you want to keep them as they are or change them. You can have your blog list alphabetically or the blog with the newest posts at the top.
There are a couple of other options there as well, including whether to add a thumbnail image from the post.
Click on the Add a blog to your list link, and then either type in or paste the URL of the blog you wish to add and then click on ADD.
Please note that if you have already added a blog to your list and you try to add it again, nothing will happen. It won't tell you it's already there, it will just look like it's frozen.
Once the blog has been added, you can now rename it in case you don't think you'll recognize it from its automatic name.
You can now either add a new blog by clicking on ADD TO LIST or click on SAVE.
You can now move this gadget to wherever you want it to appear on your blog. Click SAVE and then View Blog to check it's where you want it.
How To Add A Contact Me Button
This is something I've wanted to have on my blog for a while but never been able to work it out. Now, thanks to Yvonne/Gattino, I've finally figured it out and I thought I'd pass it on to you too.
Firstly, you need to find someone online who provides this service. The one that I have discovered is called kontactr.
You firstly need to sign up. This involves filling in a form with details such as your name and the email address you want to be contacted at. You will also need to pick a username and a password. Remember to make a note of these somewhere safe, in case you need to change any details at a later date.
Once you have completed the sign up form, you should receive an email with an activation link. Click on this and then login to kontactr using the information you have just filled in.
The next page has a series of codes allowing you to choose what your Contact button will look like.
When you have decided which one you would like, copy the code in the right hand column next to the image you have chosen.
Return to your blog and click on Design and then Page Elements. Click on Add A Gadget and scroll through to find HTML/Javascript. Once the pop-up appears, paste your code into the large box.You may wish to give this a title, but it isn't necessary.
Remember to click SAVE, then drag and drop your Contact Me gadget to wherever you would like it to appear on your blog. Click on SAVE again once it is located where you want it, then you can click on View Blog to see what it looks like.
Wednesday, 16 March 2011
How To Add A Comment To Someone Else's Blog
One of the most common complaints I've seen in blogland is 'I wanted to leave you a comment but I didn't know how' or 'It wouldn't let me'.
To add a comment, the first thing you have to do is locate the link to the comment form. This is usually located at the very bottom of any post and usually contains the word 'Comment' itself.
Click on this and a comment form will appear. Type in your comment and then select your identity. If you have a Blogger blog, then click on the Google option. If you're already logged in, it will already show your name, if not, it will ask you to log in with your usual log in that you use when you want to post.
If you have a different type of blog, such as TypePad or WordPress, then click on the OpenID option and add your LogIn details.
If you have a different type of blog, such as one connected to a website, then you can click on the Name/URL option and add your details there.
If, however, you have none of the above, then you can comment using the Anonymous option. This means you don't have to add any details to add a comment, but you may wish to add more detail to who you are when you leave your comment so the blog owner knows who you are. This could include your forum name or nickname.
If you have logged in using your Google ID, then you can also click on the Email Follow-Up Comments button - this means that after you leave a comment, if any further comments are left, you will be informed. This could be important if you have asked a question in your comment and means you don't have to remember where you asked the question to discover if it has been answered.
Remember that sometimes you will be asked to complete Word Verification before your comment will be added, and some comments won't appear immediately as they have to be approved by the blog owner.
You should also remember that some people might restrict the leaving of comments to only their followers or Google members, but most allow comments from everyone.
How To Keep A Post At The Top Of Your Blog
There will be times when you will want to keep a post at the top of your blog. This could be because you are hosting a blog candy, or looking for a design team.
Again, this is very easy.
Type up your post and publish it as normal. Then go into the Edit Posts page and reopen your post. Scroll down to the bottom of your post and click on Post Options. Click in the circle button next to Select Date and Time and type in the date and time until when you would like your post to stay at the top. If you don't know when you want to keep it there until, you can add a random date sometime in the future - you can always go back and change it later on to an earlier date so it will continue to fall down the page as normal.
How To Schedule A Post
There will be times when you want to delay when your post is published. It may be that you are going away on holiday but you still want to add a post. It's very easy to do this.
Type up your post as normal and before you click on Publish, click on the link at the bottom Post Options. This will reveal a button below where it says Post Date and Time that says Scheduled At. Click in the circle button next to that and then type in the time and date when you want your post to appear.
Then click on Publish. This will then take you to your Edit Posts page and your new post will say scheduled next to it.
You must remember to change the date and time before you click Publish in order for it to remain unpublished until the specified date.
If you forget to change the date and time before clicking Publish, then you will have to reopen the post on the Edit Posts page, click the Save As Draft option, then reopen again from the Edit Posts page and change the time and date before clicking on Publish.
For any of this to work, however, you must check that you have your time setting set to the correct time zone. To do that, click on Design, then the Settings tab and then Formatting. Scroll down until you find the Time Zone section and make sure it is set correctly. This will be (GMT+00:00) London for UK readers. Scroll through the extensive list to choose the appropriate one for you. Be aware that you must choose the correct one as it can affect other sections of your blog as well (such as date formats).
Tuesday, 15 March 2011
Word Verification and Comment Moderation
These are topics of much discussion in blog-world. Many people despise Word Verification, and many blog challenge design team members will refuse to comment on your entry if you have it.
Comment Moderation means that comments left by your visitors won't appear on your blog until you check their content and agree they can be published.
I personally don't have either, and I never have. Instead, I have my comments set up so that I receive an email telling me that someone has commented, and on which post. Then I can either read my comment in my email programme, or go over to my blog and read them there. I have to say I like to read them on my blog so I can put a face to the comment.
A lot of people have Word Verification to stop spammers from adding their comments but Blogger now has a Spam filter, and so any comment it thinks is Spam is placed in its own folder and not actually published. You can then check that folder in case a genuine comment has gone there by mistake and move it back to your normal comment folder.
So, if you want to turn Word Verification on or off, you need to click on Design and then the Settings tab and then click on Comments.
Scroll down until you find the Word Verification section and click yes or no.
For Comment Moderation, scroll down and choose the option you want - Always, Never or only on older posts. You can determine which ones.
If you choose to have Comment Moderation switched on, then you will get a notification on your dashboard telling you if you have comments and how many. You can also set it up to receive email notifications when you get comments.
You can adjust any of the other Comments settings here also.
You can decide who can comment on your blog, either allowing anyone or restricting it to only followers or Google users.
You can also decide how you want your comment form to look. There are three options - you can have a new page open with your comment form, have it appear below your post or have a pop-up window.
You can also add a message that you want to appear above the comment box, addressed to your visitors. This could just be thanking them for their comments, or something else.
There is also a box for you to fill in your email address should you wish to be informed that you have received a comment. This will mean you won't have to keep checking your comments just on the off-chance someone has left you a comment, and know which ones you have already read and which are new.
It has been brought to my attention that the new Blogger interface does not offer an option to turn off Word Verification. Hopefully this will be resolved before it becomes the norm but until then, here is the solution:
Comment Moderation means that comments left by your visitors won't appear on your blog until you check their content and agree they can be published.
I personally don't have either, and I never have. Instead, I have my comments set up so that I receive an email telling me that someone has commented, and on which post. Then I can either read my comment in my email programme, or go over to my blog and read them there. I have to say I like to read them on my blog so I can put a face to the comment.
A lot of people have Word Verification to stop spammers from adding their comments but Blogger now has a Spam filter, and so any comment it thinks is Spam is placed in its own folder and not actually published. You can then check that folder in case a genuine comment has gone there by mistake and move it back to your normal comment folder.
So, if you want to turn Word Verification on or off, you need to click on Design and then the Settings tab and then click on Comments.
Scroll down until you find the Word Verification section and click yes or no.
For Comment Moderation, scroll down and choose the option you want - Always, Never or only on older posts. You can determine which ones.
If you choose to have Comment Moderation switched on, then you will get a notification on your dashboard telling you if you have comments and how many. You can also set it up to receive email notifications when you get comments.
You can adjust any of the other Comments settings here also.
You can decide who can comment on your blog, either allowing anyone or restricting it to only followers or Google users.
You can also decide how you want your comment form to look. There are three options - you can have a new page open with your comment form, have it appear below your post or have a pop-up window.
You can also add a message that you want to appear above the comment box, addressed to your visitors. This could just be thanking them for their comments, or something else.
There is also a box for you to fill in your email address should you wish to be informed that you have received a comment. This will mean you won't have to keep checking your comments just on the off-chance someone has left you a comment, and know which ones you have already read and which are new.
UPDATE FOR THOSE USING THE NEW BLOGGER INTERFACE
It has been brought to my attention that the new Blogger interface does not offer an option to turn off Word Verification. Hopefully this will be resolved before it becomes the norm but until then, here is the solution:
So, what you need to do is make sure you are signed into your blog and then click on the Design button on the top right of the page (next to New Post and Sign Out).
Then you need to look for the grey cog icon in the top right of the page and click on it.
On the drop-down menu, click on the Old Blogger Interface button, and from the next page that uploads, select the Settings button and then follow my instructions above.
If, once you have done that, you decide that you want to revert back to the new interface, return to your dashboard and at the top of the page there should be a blue link that says
Try the Updated Blogger Interface. Click on that and you are back where you started.
Monday, 14 March 2011
Adding A Picture In Your Side Bar
Very often, we come across blog candy we want to enter. Sometimes the host asks you to add the picture of it in a post, but sometimes they are happy for you to add it in your sidebar. This option means that you can keep it on your first page, rather than it falling off as you add new posts.
This also applies if you want to add a picture that acts as a link to another site such as a blog banner belonging to a challenge site or maybe to your Docrafts gallery or similar.
So, firstly you need to save the picture you want to add to your sidebar. Now, you can either upload it directly to your sidebar from your hard-drive or you can upload it to your Photobucket album and upload it from there.
The next thing you need to do is copy the URL/blog address of the post where the blog candy is. To do this, go to the blog candy post and right click on the title itself and click on Copy Shortcut.
Now, click on Design and Page Elements and then click on Add A Gadget. Scroll down the list until you see a picture of a tree, and click on the blue + button.
Fill in the top three boxes:
If you are uploading directly from your hard-drive, click on the Browse button and locate the picture you just saved.
If you are uploading from Photobucket, then go to your Photobucket album and copy the Direct Link URL below or next to the image you want to upload. Then follow the first three steps as shown above. Then paste the URL you have just copied into the second box where it says 'From the web'.
For both options, once the picture appears on the screen, click on the Shrink to Fit button and then click on SAVE (orange button).
This also applies if you want to add a picture that acts as a link to another site such as a blog banner belonging to a challenge site or maybe to your Docrafts gallery or similar.
So, firstly you need to save the picture you want to add to your sidebar. Now, you can either upload it directly to your sidebar from your hard-drive or you can upload it to your Photobucket album and upload it from there.
The next thing you need to do is copy the URL/blog address of the post where the blog candy is. To do this, go to the blog candy post and right click on the title itself and click on Copy Shortcut.
Now, click on Design and Page Elements and then click on Add A Gadget. Scroll down the list until you see a picture of a tree, and click on the blue + button.
Fill in the top three boxes:
- Add a title to the picture you are adding
- Add a caption (this could be the closing date of the blog candy, so you know when to check back to see if you are a winner or not).
- Add the link you just copied. Right click and click paste.
If you are uploading directly from your hard-drive, click on the Browse button and locate the picture you just saved.
If you are uploading from Photobucket, then go to your Photobucket album and copy the Direct Link URL below or next to the image you want to upload. Then follow the first three steps as shown above. Then paste the URL you have just copied into the second box where it says 'From the web'.
For both options, once the picture appears on the screen, click on the Shrink to Fit button and then click on SAVE (orange button).
Saturday, 12 March 2011
How To Find Your Blog Address
There are a couple of ways of finding out what your blog address is.
The easiest way is to click on the header at the top of your blog and then look in the address box at the top of the page.
Your blog address always ends .com
If there are other words and numbers after the .com part, then you are on a specific page of your blog, whether that is a post or a search results page.
There is another way to find out what your blog address is though.
If you click on Design and then Settings, your blog address will be shown at the top of the page where it says Blog*Spot Address.
Adding A Link In A Comment
There will be times when you will want to add a link in a comment you leave on someone else's blog. This could be because you want them to look at a particular post you or someone else has published, maybe to show where you have added your post to advertize their blog candy, or you might be entering a blog challenge and their Mr Linky or Inlinkz isn't working and so you must enter by leaving a comment.
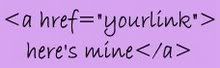
Now it's difficult to explain this in text as if I type how to add a link, it will just turn it into a link!
So, I have a picture showing how you do this.
Now it's difficult to explain this in text as if I type how to add a link, it will just turn it into a link!
So, I have a picture showing how you do this.
Where it says "yourlink", add the URL of your blog or the blog post you want to link to. Remember to put the speech marks around it.
Where it says 'here's mine', put the text you want it to say - this is the text of your link. The rest of this text remains the same every time.
Adding A Followers Gadget
Many bloggers like to see who is following their blog. This can be done by adding a Followers gadget to your blog. If your template doesn't already include this, (the one I got from Leelou did, but not all will), and you want one, then follow these instructions:
Click on Design and then click on Page Elements. Click on one of the Add A Gadget buttons and then click on the blue + button next to the Followers option. As described in an earlier post, you can then drag the gadget to wherever you want it to be and then remember to click on the SAVE button before leaving to View Blog.
Click on Design and then click on Page Elements. Click on one of the Add A Gadget buttons and then click on the blue + button next to the Followers option. As described in an earlier post, you can then drag the gadget to wherever you want it to be and then remember to click on the SAVE button before leaving to View Blog.
How To Move Gadgets and Page Elements Around
Once you have added a few elements and gadgets to your page, you may wish to rearrange them on your page.
To do this, click on Design in the top right corner when you are logged in and then click on Layout. This will show the basic layout of your page and all the gadgets you've added.
Adding A Picture In A Post and Removing It
More often than not, you will want to add a picture in your post. There are a couple of ways of adding a picture and I will explain both ways.
I find it easiest to either add my pictures as I am typing or type up my whole post and then go back and decide where I want my picture to appear.
Either way, you want your cursor to be where you want your picture to appear. Then click on the 'Insert Picture/Image' button. This a button that looks like a landscape painting. You can only upload the following file types, so make sure your image is saved as one of these first: JPG, GIF or PNG files.
Again, you can click on the image to determine its position and size, and add a caption if required. (I've never added a caption before, but I like it!)
I find it easiest to either add my pictures as I am typing or type up my whole post and then go back and decide where I want my picture to appear.
Either way, you want your cursor to be where you want your picture to appear. Then click on the 'Insert Picture/Image' button. This a button that looks like a landscape painting. You can only upload the following file types, so make sure your image is saved as one of these first: JPG, GIF or PNG files.
Uploading from your hard-drive is probably the easiest way to do this. However, depending on whether you are using the Old or Updated editor will depend on the next screen you see.
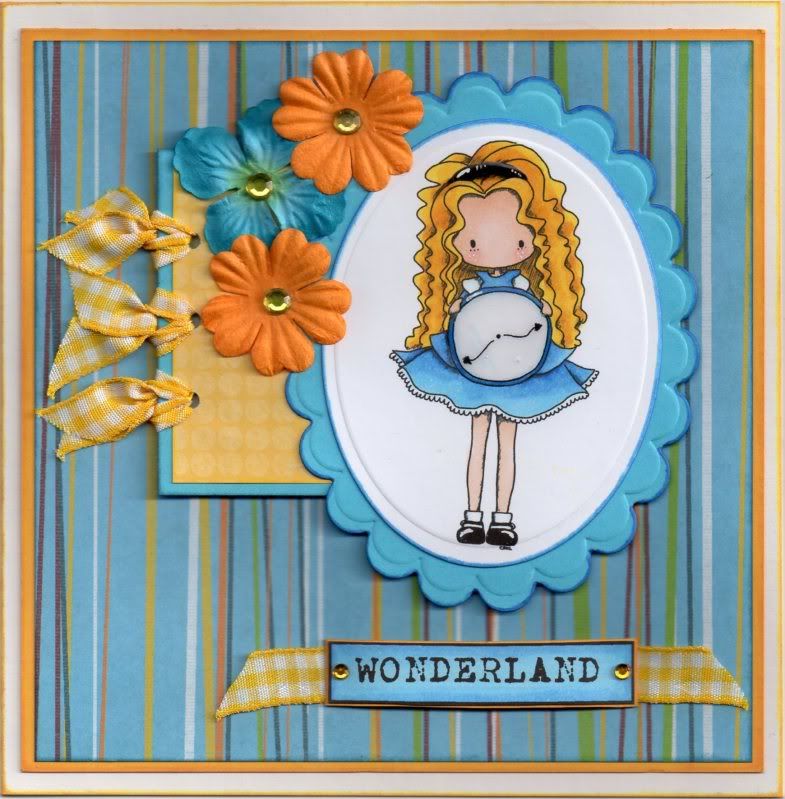
In the Updated editor (the one I use), you will get a split screen pop-up. Make sure the word Upload is highlighted in the left screen and then click on the Browse button. This will then access your files on your hard-drive. Locate the image you wish to upload and click on it. You will then see a wheel going round as it uploads and the image will then appear on the screen. Click on it and a blue line will appear around it and then click on Add selected.
 |
| My Alice In Wonderland card |
The image will then appear at that point in your post. If you now click on the image, you can choose the size of the image and the position of the image (centralized, to the left or right). You can also add a caption.
You can drag your picture around if it's not where you want it but it's not easy and you can only move it within the confines of the visible screen so you have to do it a bit at a time. I often find it easier to delete it and start again.
To add a picture with the Old editor, firstly click on the Add Image button (landscape painting). A pop-up box will appear and you need to look to the left of the box. There it says Add an image from your computer. Click on the Browse button and follow the instructions as above. The file location of the image will appear in the box next to the word Browse. Now decide on the position of your image in your post (centralized, to the left or right) and the size you want it.
Now, here you can upload more than one image in the same location by clicking on the Browse button again and locating a second image. However, remember that it's not easy to drag and drop images, so if you don't want your image here, it's actually easier to click on the Upload Image button (orange), relocating your cursor and starting again.
Once you've selected the image(s) you want,,click on Upload Image (orange button) and the picture(s) you want to upload will appear in another pop-up box. Once it/they appear(s), click DONE.
The other way to upload a picture is to do it from somewhere like Photobucket. This is an online storage facility for your images. This is a great way to ensure that you have a backup of your images just in case your hard-drive fails.
Firstly, in your Photobucket or similar album, select the image you want to upload and copy the Direct Link code that will appear beneath or next to the image. Then return to the blogger new post page (hold down the Alt button and then click on the Tab button until that window is highlighted) and click on the Insert Image button. Look to the left of the pop-up and select From a URL. A box will appear on the right hand side of the pop-up saying Paste an image URL here. Paste the link you copied in Photobucket into this box. Eventually an image will appear towards the bottom of the box and then you can click on Add Selected.
 |
| My Alice In Wonderland card |
When using the Old editor, click on the Add Image button and look to the right of the pop-up for Or add an image from the web. Again, paste the Direct Link into the box. As before, you can add more than one image, but note the advice given earlier.
To remove a picture is just as easy. If you have uploaded in the Old editor, just highlight the image and click on delete. If you have uploaded in the Updated editor, click on the image and click on Remove in the blue bar that appears.
How To Add A Link
Often, when blogging, we want to add a link within the text. This could be simply to refer back to someone else's blog, or to a video we've seen on youtube, or to enter blog challenges.
If you want to add a link to someone's blog, then go to that blog and copy the URL in the address bar at the top of the page or right click on the blog's header and click on Copy Shortcut.
Then go to your blog post and type in the word you would like to be the link. For example you might add that person's name or the word 'here' or something similar.
Then highlight the text you want as a link and click on the word Link in the toolbar (in the old editor, this is a button that looks like a chain link with a globe behind it). This will bring up a pop-up box. Paste the URL you have copied into the box marked Web Address.
Alternatively you can add an email address as a link using the same method, but click in the circle next to Email Address.
You will then have a link to that URL. You won't be able to click on it though until you have published your post. It will appear underlined though.
For example:
Kathleen's Cardmaking Blog
How To Add A Post and Labels
So, now you are ready to add a post.
Click on New Post in the top right of the page and a new page will open with a title box and a text box.
Add the title of your new post and then click into the text box.
Add the text that you want to add.
Once you have added your text, you may want to add links within the text and pictures. This will be covered in later posts.
The next step is to add Labels. These are keywords that will allow you and your followers to find related posts. For example, if you have used your distress inks, then add that in the labels box. Then, all posts that contain this label can be accessed all at once. Remember though, that you do have a limited number of characters in this box, so use abbreviations where possible for posts where you include lots of labels. If you exceed the number of characters allowed, you won't be able to publish your post until you reduce them.
The next thing you may want to do is check your spelling. To do this, click on the ABC button with a green tick to the right of the toolbar. this will highlight any words it doesn't recognize. This could be because they are incorrectly spelled or because they are brand names or people's names. If you see that it is an incorrectly spelled word, then click on the highlighted word and select the correct spelling. If you don't see the correct spelling, then you can just change the spelling yourself by retyping. Once you have checked your post, just click on the ABC button again and the yellow highlight will disappear.
Once you are happy with your post you can either save it as a draft, publish it or schedule it to post at a future time or date. Scheduling will be dealt with at a later date.
To save your post to work on it at a later date, just click on SAVE NOW (blue button under the text box). To access it at a later date, click on the New Post button in the top right of your blog and then click on Edit Posts. You post will be in the list with the word draft next to it. Click on the word Edit and then you can continue to work on it.
If you are happy with your post you can now publish it. To do this, just click on PUBLISH POST orange button under the text box).
Adding A Visitor Counter and other HTML Gadgets
Lots of bloggers like to know just how many people have come to visit their blogs.
The best way to do this is to add a counter.
There are quite a few places to get one of these, but the place I got the one for this blog was Amazing Counters.
Click in the circle button next to the counter you want and then scroll down to the arrow button at the bottom of the page. The next stage is to complete the form with your details and your blog details.
Click on the Submit button, and the code should be sent to your email account. You can either copy the code from your email or you can click on the button that says Get HTML Code.
Copy the code and then click on Design and then Page Elements and click on Add A Gadget. Scroll down until you find HTML/Javascript and click on the blue + button.
This will open a pop-up box. Paste the code into the large white box. You can give this a title like Visitor Counter but this isn't necessary. Then click on Save.
You can then drag your gadget box around the page to where you want it to appear on your blog page. It can go in the sidebars or at the top or the bottom of the page.
If you ever have to replace your counter, you can give it a start number. You can get this number by clicking on Design and then Stats. Look in the Overview section and, on the right of the page, look for Pageviews all time history. Put this number in as the start number in the form you fill in with your details and your blog details.
This is how you will add any other HTML gadgets like blinkies, Feedjit feeds, slideshows etc.
Friday, 11 March 2011
Changing Your Background
If you already have a fancy background and you want to change it, or you are being forced to change it because the background you already added has mysteriously disappeared, then this is the post for you.
The first thing you need to do is remove the HTML code for the old background.
To do this, click on Design and then click on Page Elements and locate the Gadget that has the HTML code for the old background. Click on Edit and then, when the pop-up opens, click on Remove.
Now upload your new background as shown in this post.
How To Add A Background
The background for this blog was obtained from Leelou Blogs. I went with this one as it seems the easiest to use and install. Leelou provide the whole template including headers and buttons so you won't have to add extra code for these features.
There are other places to get backgrounds, and they may have different ways of adding their background templates. I'll stick with this one for this post, but might address the others at a later date. Other sites may also require you to add buttons, headers and other features separately, if indeed they have co-ordinating ones.
The first thing you have to do is make sure you have the correct blogger template to allow you to add a new background. Click on Design and then Template Designer and make sure you have Simple or Minima selected.
Next, you need to go to Leelou and decide which background you want. Then you need to decide if you want a two or three column blog. Select the appropriate blog background by clicking on it.
You then need to click on the 'Grab This Layout' button.
Then you follow the instructions given to you by Leelou Blogs:
Installation instructions:
1.Click Save when the pop-up box appears. Save it to somewhere where you can find it again.
2. Go back to your blog and click on Design. Then select 'Edit HTML' and then click the Browse button and locate the file you just saved.
5. Select 'Open'
6. Select 'Upload'
7. Select 'KEEP WIDGETS'
8. SAVE
Now click on View Blog and your background and header and any other banners and icons should be there.
Introduction Post
Well, this is my first post on this new blog.
The idea of it is to give you advice and instruction for setting up and maintaining your blog.
I will endeavour to cover as much as possible. If you have any questions I will try and answer them. If I can't - I'll ask someone who can!!!
The idea of it is to give you advice and instruction for setting up and maintaining your blog.
I will endeavour to cover as much as possible. If you have any questions I will try and answer them. If I can't - I'll ask someone who can!!!
Subscribe to:
Posts (Atom)
